The Path to Pollination – Building an Educational Tool
As a visitor services specialist at Fort Snelling State Park I help out with many different things. I answer phone calls, work at the front desk, help with educational programs, and much more. So when Sarah, one of the Naturalists at the park, approached me this spring with the idea to build a giant flower for a pollinator program I thought, “why not, this could be fun.”
Sarah had been doing some research about how pollination works and she came across a YouTube video made by the Cincinnati Nature Center where they used a giant model of a flower to demonstrate the process. She immediately found their contact info and asked if they would be ok with us making our own version. They said yes!
It was early April and Fort Snelling State Park was closed due to flooding. We decided to use that time to build the flower with goal of finishing it before summer. We went out and purchased a very random list of supplies and started on the construction on April 25th.
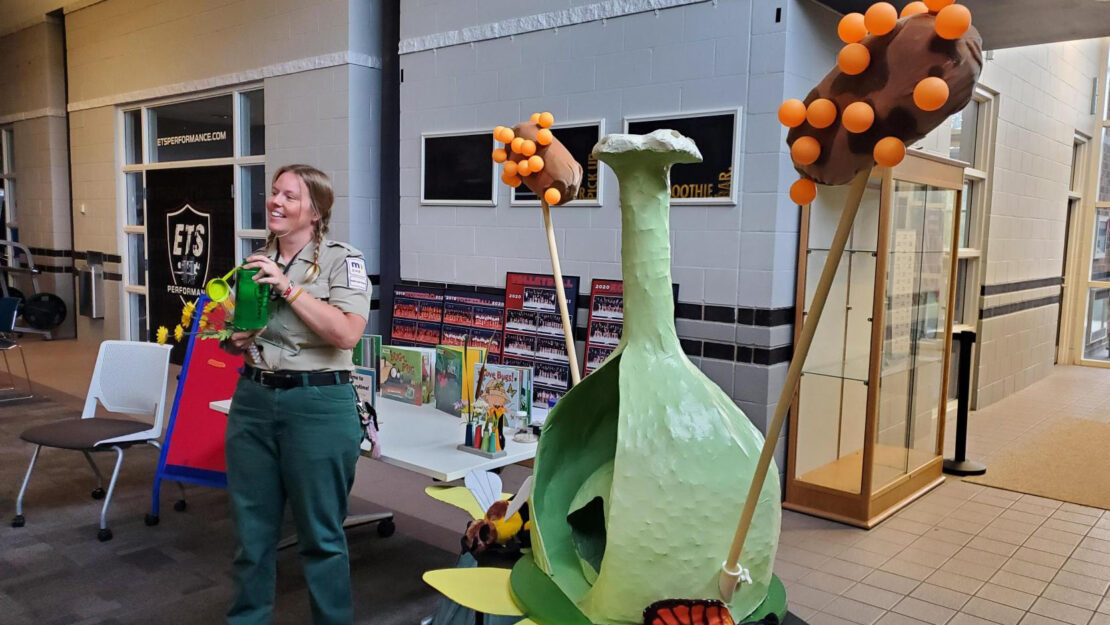
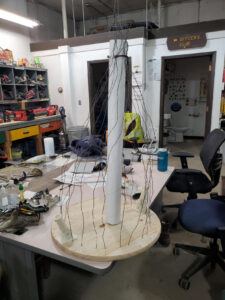
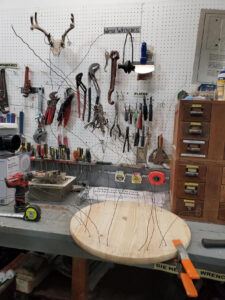
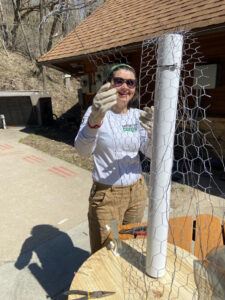
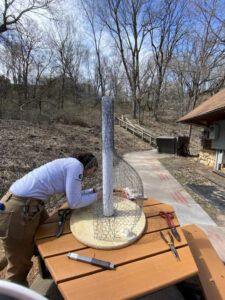
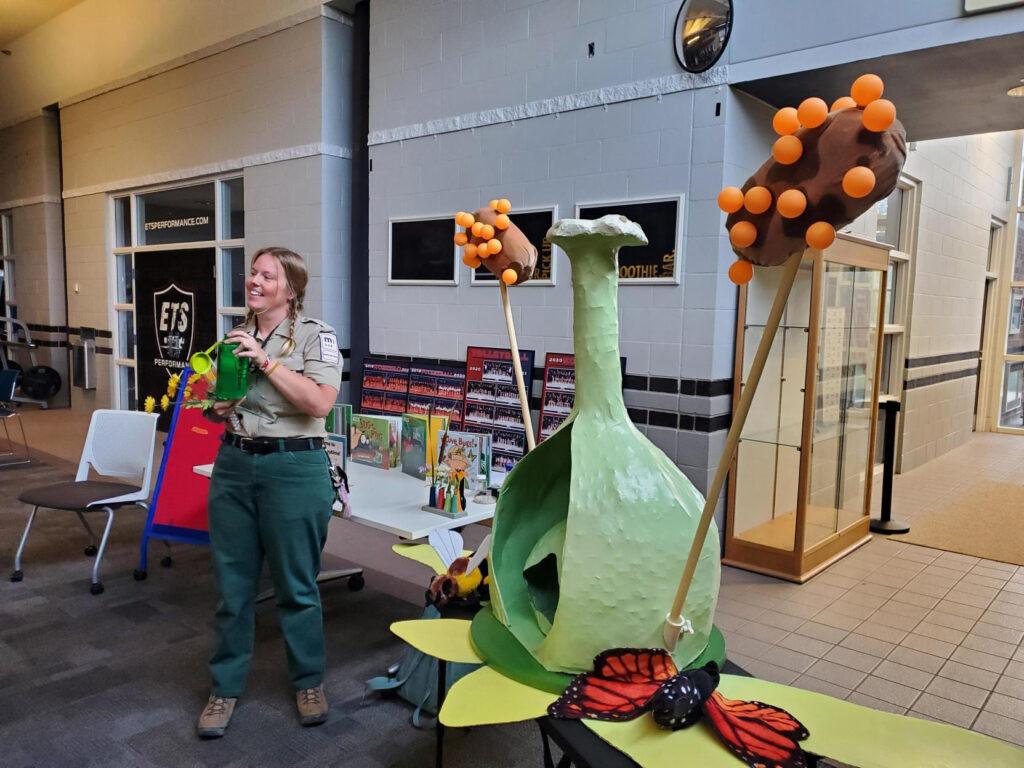
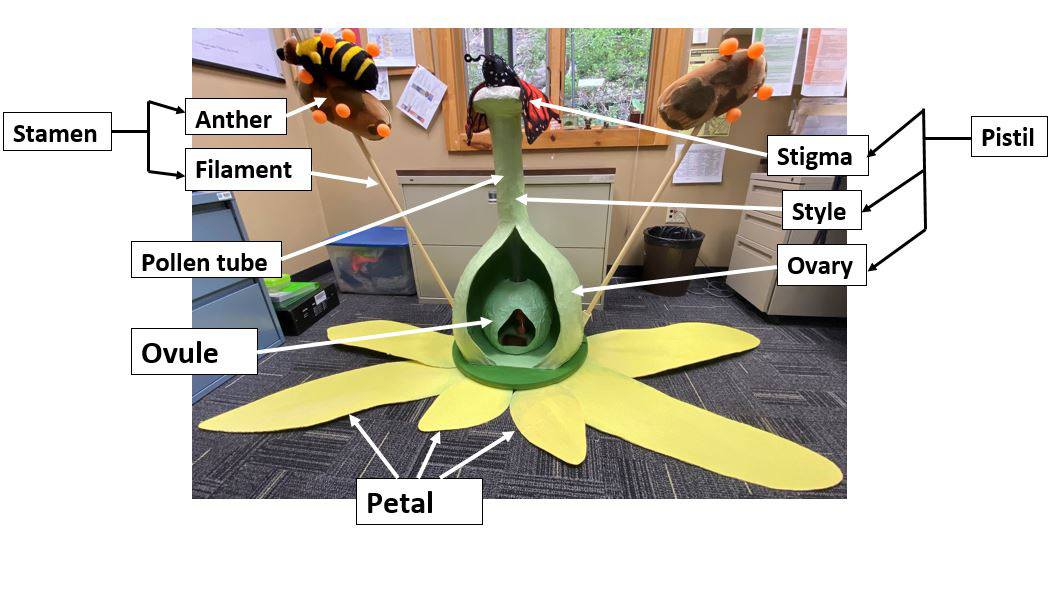
Phase one was “the spaghetti monster.” We headed to our machine shop and drilled holes into a large wooden disk and wove wires into them, making the base of the flower. To reach the rest of the supplies we had to hike the monster past flood waters to the visitor center where we attached chicken wire and molded the final shape. This main shape represents the pistil of the flower including the stigma (at the top), the style, and a space for the ovary to fit inside. During this step we also attached two flag pole holders to the base to hold the stamens of the flower later on.
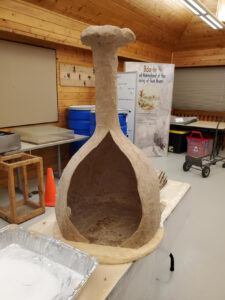
Phase two was Papier-mâché. We used paper towels to cover the chicken wire and smooth out the shape. We also created a smaller inner structure that would serve as the ovary. This phase took quite a while, with many breaks for drying, but we finally finished it almost two weeks later on May 8th.

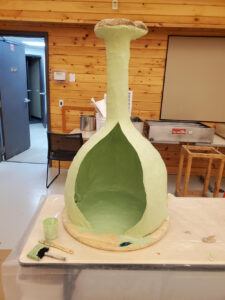
On May 9th we started phase three, painting/aesthetics. The pistil got two coats of green paint. Wooden dowels for the filament of the stamen were painted yellow and Styrofoam was attached to the ends and covered with brown fabric to make the anthers. We also attached Velcro to the anthers so that our pollen (orange ping pong balls covered in Velcro) would stick to them. We inserted a clear plastic tube down the pistil to the ovary to serve as the pollen tube. Finally, we created petals out of cardboard painted yellow.
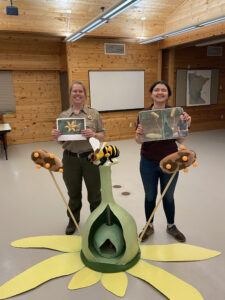
We finished the flower on May 20th after completing the final step of outfitting a stuffed animal bee with Velcro so that she could transport pollen from the stamen to the pistil. This summer Sarah and I are traveling to libraries around the Twin Cities and using our flower to teach about the importance of pollinators and to show how pollination works. So far it has been a hit!
Resources: